二十二、Docker 部署 Nginx 环境
Docker 是一个开源的应用容器引擎,基于 Go 语言 并遵从 Apache2.0 协议开源
Docker 可以让开发者打包它们的应用以及依赖包到一个轻量级、可移植的容器中,然后发布到任何流行的 Linux 机器上,也可以实现虚拟化
Docker 使用完全使用沙箱机制,两个容器之间不会有任何接口 (这个有点像 iPhone 的 app ) ,更重要的是容器性能开销极低
学习前提
在继续阅读之前,我们希望你对 Linux 有一些基本的了解,包括
1、 会使用Linux常用的命令;
2、 知道大部分的Linux常识,比如终端、service、ip、用户、组等;
3、 熟练使用Ubuntu或者Centos或者MacOS种的一种昂;
如果你对这些知识还是一知半解,可以访问我们的 Linux 基础教程 先进行一些简单的了解
Docker的应用场景
1、 Web应用的自动化打包和发布;
2、 自动化测试和持续集成、发布;
3、 在服务型环境中部署和调整数据库或其他的后台应用;
4、 从头编译或者扩展现有的OpenShift或CloudFoundry平台来搭建自己的PaaS环境;
Docker 的优点
1、 简化程序;
Docker 让开发者可以打包他们的应用以及依赖包到一个可移植的容器中,然后发布到任何流行的 Linux 机器上,便可以实现虚拟化
Docker 改变了虚拟化的方式,使开发者可以直接将自己的成果放入 Docker 中进行管理
方便快捷已经是 Docker 的最大优势,过去需要用数天乃至数周的 任务,在Docker容器的处理下,只需要数秒就能完成
2、 解决运维配置噩梦;
在没有 Docker 之前,每一台机器,每一个要用到的依赖,几乎都要重新配置一遍
比如新增一台 MySQL 数据库,就要从头开始配置所有环境
有了 Docker 之后,只需要从仓库里把之前的 MySQL 镜像拉出来,直接使用
3、 节省开支;
使用 Docker ,可以在一台电脑上部署多个服务,多个应用,从而充分榨干每一滴性能
同时,又不用担心多个应用之间出现相互访问的情况
相关链接
Docker 官网: http://www.docker.com
Github Docker 源码: https://github.com/docker/docker
Nginx 是当下最流行的 Web 服务器软件之一,以高性能著称。Docker 部署 Nginx 环境有两种方式:通过 Dockerfile 构建 和 从 Docker Hub 仓库拉取
一 使用 docker pull nginx 拉取 Nginx 镜像
这是最简单的方式,开箱即用
1、 使用dockersearchnginx命令列出docker.io上所有的Nginx有关的镜像;
    [root@www.hotmindshare.com ~]# docker search nginx
    NAME                                                   DESCRIPTION                                     STARS               OFFICIAL            AUTOMATED
    nginx                                                  Official build of Nginx.                        8564                [OK]
    jwilder/nginx-proxy                                    Automated Nginx reverse proxy for docker con…   1337                                    [OK]
    richarvey/nginx-php-fpm                                Container running Nginx + PHP-FPM capable of…   547                                     [OK]
    jrcs/letsencrypt-nginx-proxy-companion                 LetsEncrypt container to use with nginx as p…   371                                     [OK]
    kong                                                   Open-source Microservice & API Management la…   188                 [OK]
    webdevops/php-nginx                                    Nginx with PHP-FPM                              103                                     [OK]
    kitematic/hello-world-nginx                            A light-weight nginx container that demonstr…   99
    bitnami/nginx                                          Bitnami nginx Docker Image                      52                                      [OK]
    zabbix/zabbix-web-nginx-mysql                          Zabbix frontend based on Nginx web-server wi…   51                                      [OK]
    1and1internet/ubuntu-16-nginx-php-phpmyadmin-mysql-5   ubuntu-16-nginx-php-phpmyadmin-mysql-5          35                                      [OK]
    linuxserver/nginx                                      An Nginx container, brought to you by LinuxS…   35
    tobi312/rpi-nginx                                      NGINX on Raspberry Pi / armhf                   19                                      [OK]
    nginxdemos/nginx-ingress                               NGINX Ingress Controller for Kubernetes . Th…   11
    blacklabelops/nginx                                    Dockerized Nginx Reverse Proxy Server.          9                                       [OK]
    wodby/drupal-nginx                                     Nginx for Drupal container image                9                                       [OK]
    webdevops/nginx                                        Nginx container                                 8                                       [OK]
    centos/nginx-18-centos7                                Platform for running nginx 1.8 or building n…   6
    nginxdemos/hello                                       NGINX webserver that serves a simple page co…   6                                       [OK]
    1science/nginx                                         Nginx Docker images that include Consul Temp…   4                                       [OK]
    centos/nginx-112-centos7                               Platform for running nginx 1.12 or building …   3
    pebbletech/nginx-proxy                                 nginx-proxy sets up a container running ngin…   2                                       [OK]
    travix/nginx                                           NGinx reverse proxy                             1                                       [OK]
    toccoag/openshift-nginx                                Nginx reverse proxy for Nice running on same…   1                                       [OK]
    mailu/nginx                                            Mailu nginx frontend                            0                                       [OK]
    ansibleplaybookbundle/nginx-apb                        An APB to deploy NGINX                          0                                       [OK]
有很多版本,我们选择官方的 nginx
2、 拉取最新的nginx标签;
    [root@www.hotmindshare.com ~]# docker pull nginx:latest
    latest: Pulling from library/nginx
    Digest: sha256:0fb320e2a1b1620b4905facb3447e3d84ad36da0b2c8aa8fe3a5a81d1187b884
    Status: Image is up to date for nginx:latest
3、 下载完成后,可以在本地镜像列表里找到REPOSITORY为nginx,标签为latest的镜像;
    [root@www.hotmindshare.com ~]# docker images nginx
    REPOSITORY  TAG     IMAGE ID      CREATED      SIZE
    nginx       latest  ae513a47849c  4 weeks ago  109MB
二、 通过 Dockerfile 文件构建
这种方式比较复杂,但可以一定程度的定制和熟悉如何编译安装 Nginx
1、 创建文件和目录;
创建目录 **nginx** 用于存放后面的相关东西
[root@www.hotmindshare.com ~]# mkdir -p nginx/www nginx/logs nginx/conf
<table>
 <thead>
  <tr>
   <th align="left">目录</th>
   <th align="left">说明</th>
  </tr>
 </thead>
 <tbody>
  <tr>
   <td align="left">nginx/www</td>
   <td align="left">该目录将映射为 nginx 容器配置的虚拟目录</td>
  </tr>
  <tr>
   <td align="left">nginx/logs</td>
   <td align="left">该目录将映射为 nginx 容器的日志目录</td>
  </tr>
  <tr>
   <td align="left">nginx</td>
   <td align="left">conf</td>
  </tr>
 </tbody>
</table>
2、 创建nginx/Dockerfile文件;
    [root@www.hotmindshare.com ~]# touch nginx/Dockerfile
    [root@www.hotmindshare.com ~]# cd nginx
    [root@www.hotmindshare.com nginx]# vi Dockerfile
然后将下面的内容拷贝到 Dockerfile 文件中
    FROM debian:stretch-slim
    LABEL maintainer="NGINX Docker Maintainers <docker-maint@nginx.com>"
    ENV NGINX_VERSION 1.13.12-1~stretch
    ENV NJS_VERSION   1.13.12.0.2.0-1~stretch
    RUN set -x \
        && apt-get update \
        && apt-get install --no-install-recommends --no-install-suggests -y gnupg1 apt-transport-https ca-certificates \
        && \
        NGINX_GPGKEY=573BFD6B3D8FBC641079A6ABABF5BD827BD9BF62; \
        found=''; \
        for server in \
            ha.pool.sks-keyservers.net \
            hkp://keyserver.ubuntu.com:80 \
            hkp://p80.pool.sks-keyservers.net:80 \
            pgp.mit.edu \
        ; do \
            echo "Fetching GPG key $NGINX_GPGKEY from $server"; \
            apt-key adv --keyserver "$server" --keyserver-options timeout=10 --recv-keys "$NGINX_GPGKEY" && found=yes && break; \
        done; \
        test -z "$found" && echo >&2 "error: failed to fetch GPG key $NGINX_GPGKEY" && exit 1; \
        apt-get remove --purge --auto-remove -y gnupg1 && rm -rf /var/lib/apt/lists/* \
        && dpkgArch="$(dpkg --print-architecture)" \
        && nginxPackages=" \
            nginx=${NGINX_VERSION} \
            nginx-module-xslt=${NGINX_VERSION} \
            nginx-module-geoip=${NGINX_VERSION} \
            nginx-module-image-filter=${NGINX_VERSION} \
            nginx-module-njs=${NJS_VERSION} \
        " \
        && case "$dpkgArch" in \
            amd64|i386) \
    arches officialy built by upstream
                echo "deb https://nginx.org/packages/mainline/debian/ stretch nginx" >> /etc/apt/sources.list.d/nginx.list \
                && apt-get update \
                ;; \
            *) \
    we're on an architecture upstream doesn't officially build for
    let's build binaries from the published source packages
                echo "deb-src https://nginx.org/packages/mainline/debian/ stretch nginx" >> /etc/apt/sources.list.d/nginx.list \
                \
    new directory for storing sources and .deb files
                && tempDir="$(mktemp -d)" \
                && chmod 777 "$tempDir" \
    (777 to ensure APT's "_apt" user can access it too)
                \
    save list of currently-installed packages so build dependencies can be cleanly removed later
                && savedAptMark="$(apt-mark showmanual)" \
                \
    build .deb files from upstream's source packages (which are verified by apt-get)
                && apt-get update \
                && apt-get build-dep -y $nginxPackages \
                && ( \
                    cd "$tempDir" \
                    && DEB_BUILD_OPTIONS="nocheck parallel=$(nproc)" \
                        apt-get source --compile $nginxPackages \
                ) \
    we don't remove APT lists here because they get re-downloaded and removed later
                \
    reset apt-mark's "manual" list so that "purge --auto-remove" will remove all build dependencies
    (which is done after we install the built packages so we don't have to redownload any overlapping dependencies)
                && apt-mark showmanual | xargs apt-mark auto > /dev/null \
                && { [ -z "$savedAptMark" ] || apt-mark manual $savedAptMark; } \
                \
    create a temporary local APT repo to install from (so that dependency resolution can be handled by APT, as it should be)
                && ls -lAFh "$tempDir" \
                && ( cd "$tempDir" && dpkg-scanpackages . > Packages ) \
                && grep '^Package: ' "$tempDir/Packages" \
                && echo "deb [ trusted=yes ] file://$tempDir ./" > /etc/apt/sources.list.d/temp.list \
    work around the following APT issue by using "Acquire::GzipIndexes=false" (overriding "/etc/apt/apt.conf.d/docker-gzip-indexes")
      Could not open file /var/lib/apt/lists/partial/_tmp_tmp.ODWljpQfkE_._Packages - open (13: Permission denied)
      ...
      E: Failed to fetch store:/var/lib/apt/lists/partial/_tmp_tmp.ODWljpQfkE_._Packages  Could not open file /var/lib/apt/lists/partial/_tmp_tmp.ODWljpQfkE_._Packages - open (13: Permission denied)
                && apt-get -o Acquire::GzipIndexes=false update \
                ;; \
        esac \
        \
        && apt-get install --no-install-recommends --no-install-suggests -y \
                            $nginxPackages \
                            gettext-base \
        && apt-get remove --purge --auto-remove -y apt-transport-https ca-certificates && rm -rf /var/lib/apt/lists/* /etc/apt/sources.list.d/nginx.list \
        \
    if we have leftovers from building, let's purge them (including extra, unnecessary build deps)
        && if [ -n "$tempDir" ]; then \
            apt-get purge -y --auto-remove \
            && rm -rf "$tempDir" /etc/apt/sources.list.d/temp.list; \
        fi
    forward request and error logs to docker log collector
    RUN ln -sf /dev/stdout /var/log/nginx/access.log \
        && ln -sf /dev/stderr /var/log/nginx/error.log
    EXPOSE 80
    STOPSIGNAL SIGTERM
    CMD ["nginx", "-g", "daemon off;"]
3、 使用dockerbuild命令通过Dockerfile创建镜像souyunku/nginx:jessie-1.13.12;
    [root@www.hotmindshare.com ~]# docker build -t souyunku/nginx:1.13.12-1-stretch .
    Sending build context to Docker daemon  8.704kB
    Step 1/9 : FROM debian:stretch-slim
    stretch-slim: Pulling from library/debian
    f2aa67a397c4: Already exists
    Digest: sha256:b7da507acebb30938b84d38e5adec9755fa3a41d78527ecdc2440c31c4730b11
    Status: Downloaded newer image for debian:stretch-slim
    ...
4、 创建完成后,可以在本地的镜像列表里查找到刚刚创建的镜像;
    [root@www.hotmindshare.com ~]# docker images souyunku/nginx:1.13.12-1-stretch
    REPOSITORY  TAG                IMAGE ID     CREATED            SIZE
    souyunku/nginx  1.13.12-1-stretch  a5ea477e09b9 About a minute ago 109MB
运行 souyunku/nginx:1.13.12-1-stretch 镜像创建容器
1、 在当前目录的www目录下新建文件index.html输入以下内容;
<!DOCTYPE html>
<meta charset="utf-8" />
<title>www.hotmindshare.com 安仔的技术指南,教程 </title>
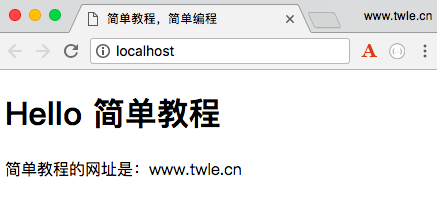
<h1>Hello www.hotmindshare.com 安仔的技术指南</h1>
<p>www.hotmindshare.com 安仔的技术指南的网址是:www.hotmindshare.com </p>
2、 在当前目录的conf目录下新建文件nginx.conf输入以下内容;
    worker_processes  1;
    events {
        worker_connections  1024;
    }
    http {
        include       mime.types;
        default_type  application/octet-stream;
        sendfile        on;
        tcp_nopush     on;
       keepalive_timeout  0;
        keepalive_timeout  65;
        gzip  on;
        server {
            listen       80;
            server_name  localhost;
            location / {
                root   /www;
                index  index.html index.htm index.php;
            }
        }
    }
3、 使用下面的命令运行我们刚刚创建的souyunku/nginx:1.13.12-1-stretch镜像;
    [root@www.hotmindshare.com nginx]# docker run -p 80:80 --name my-nginx -v $PWD/www:/www -v $PWD/conf/nginx.conf:/etc/nginx/nginx.conf -v $PWD/logs:/wwwlogs  -d souyunku/nginx:1.13.12-1-stretch
    8c232bd675d742a313ea7e222e3ef1ca864c76815083451da7f89118094c6815
<table>
 <thead>
  <tr>
   <th align="left">参数</th>
   <th align="left">说明</th>
  </tr>
 </thead>
 <tbody>
  <tr>
   <td align="left">-p 80:80</td>
   <td align="left">将容器的 80 端口映射到主机的 80 端口</td>
  </tr>
  <tr>
   <td align="left">--name mynginx</td>
   <td align="left">将容器命名为 my-nginx</td>
  </tr>
  <tr>
   <td align="left">-v $PWD/www:/www</td>
   <td align="left">将当前目录下的 www 挂载到容器的 /www</td>
  </tr>
  <tr>
   <td align="left">-v $PWD/conf/nginx.conf:/etc/nginx/nginx.conf</td>
   <td align="left">将当前目录下的 nginx.conf 挂载到容器的 /etc/nginx/nginx.conf</td>
  </tr>
  <tr>
   <td align="left">-v $PWD/logs:/wwwlogs</td>
   <td align="left">将主机中当前目录下的 logs 挂载到容器的 /wwwlogs</td>
  </tr>
 </tbody>
</table>
查看容器启动情况
可以使用 docker ps 命令可以查看容器启动的情况
[root@www.hotmindshare.com ~]# docker ps
CONTAINER ID        IMAGE                          COMMAND                  CREATED             STATUS              PORTS                     NAMES
8c232bd675d7        souyunku/nginx:1.13.12-1-stretch   "nginx -g 'daemon of…"   6 seconds ago       Up 20 seconds       0.0.0.0:80->80/tcp        my-nginx
d07b599f11e4        jcdemo/flaskapp                "python /src/app.py"     11 hours ago        Up 11 hours         0.0.0.0:32768->5000/tcp   hardcore_lalande
通过浏览器访问 http://localhost 输出如下